First thing you want to do after you get a GameShell is to connect it with your PC. You can do so via WiFi or USB. After that you can SSH into GameShell or use FTP client to transfer files.
Establish connection
Via WiFi
Follow skywalker101’s tutorial
Via USB
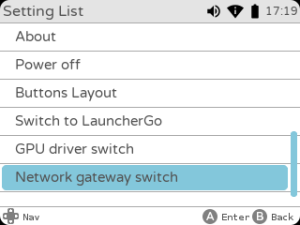
Go to Settings and choose Network gateway switch

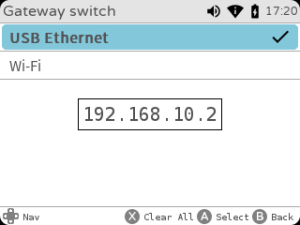
Choose USB Ethernet

Now if you connect your GS to PC via USB cable, it should be recognized as a COM Gadget or something like that. You have to install drivers to use it.
On Windows
If you are on windows, please follow the Petrakis’s tutorial and start on the step **Setting up Windows driver**.
On Mac
1. Download HoRNDIS driver from: https://joshuawise.com/horndis 1. Once the GameShell connects with the USB cable, go to System Preferences -> Sharing and enable Internet Sharing to RNDIS.
On Linux
Follow this tutorial: https://forum.clockworkpi.com/t/usb-eth-connect-gameshell-to-linux-pc/1643
Transfer files
FTP client
1. Install a FTP client, for example, FileZilla. 1. Make sure your GameShell connected to the same wireless network as the computer you are using.
1. You can do this through; Home screen >> Settings >> Wi-Fi.
1. Check your SSH / SCP IP address in TinyCloud on your GameShell.
1. You can do this through; Home screen >> TinyCloud
1. Remember the IP address that is shown. Also remember the ID (username) and Key (password). Both are: cpi.
1. Open FileZilla 1. Enter your IP address, Username (cpi), Password (cpi) & Port (22) in the above fields.
1. The default port for SSH is always 22.
1. Click “Quickconnect” button to establish connection 1. When connected you can see your own computers local folders & files on the left. And the GameShell folders & on the right. From here you can simply drag files from left to right in the folder you want stuff to go to.