Powering Up
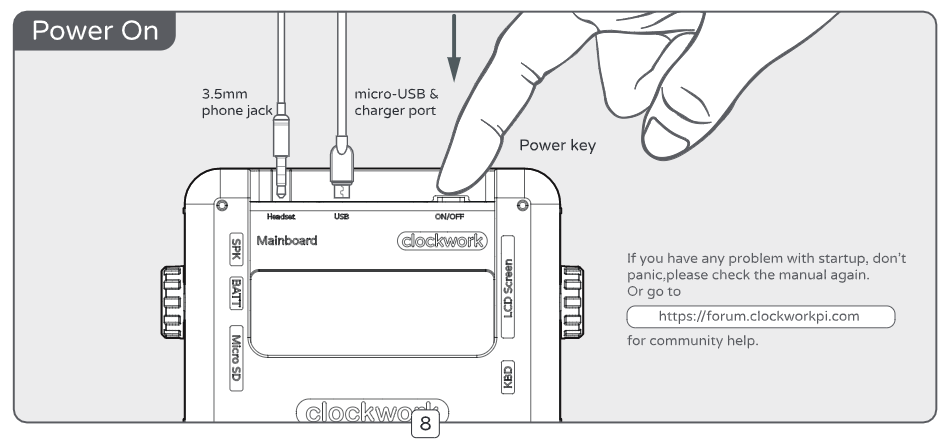
After you’ve assembled the GameShell you can turn the device on using the power button found on the back of the device

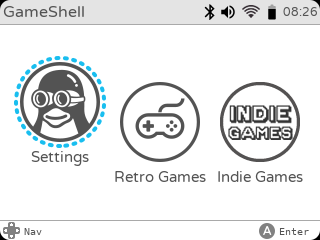
If you’ve assembled the device correctly, the GameShell will go through an initial boot sequence and you’ll be greeted with the Launcher Homepage

Settings
Now that the GameShell is booted up you’ll want to go through the Settings and get a few things set up:
- Connect your GameShell to a Wi-Fi network. Note that the wifi chipset on the GameShell does not currently support 5GHz bands
- Set the system Timezone to your preferred location so that the system clock will show the correct time
- Change your preferred Language
- Consider the GameShell’s gamepad Button Layout. The assembly instructions use the Xbox controller A/B format. If you plan on playing retro games from Nintendo (NES, SNES, Gameboy, GBA, etc.) you might want to adjust these settings and reverse the A/B buttons on your GameShell
Danger Zone
If you’re new to the GameShell and uncomfortable with Linux systems, I’d advise against messing with the following settings unless you absolutely have to:
- Update Launcher - Make sure you check that the GameShell OS is updated to the latest GameShell OS before you update the launcher. Upgrading the GameShell OS cannot yet be done within the launcher. You will need to check the GameShell Forums for the latest OS release announcements and for upgrade instructions.
- Switch to LauncherGo - this is an experimental version of the current Launcher written in the Go programming language.
- GPU Driver Switch - gives you the ability to select between the default graphics driver (FBTURBO) and the experimental LIMA driver
Let’s Play Some Games!
The GameShell comes with:
- Independent (indie) games that have been built to run on the GameShell without any additional software
- Game Engines that can run games built using those engines
- Emulators that emulate retro gaming consoles
Independent Games
The GameShell comes with:
- Cave Story
- Planet-Busters
- OpenTyrian
- No.909
- NyanCat
- 2048
- Hurrican
- GSPLauncher
Game Engines
Game Engines help developers build games across multiple platforms. The GameShell comes with support for popular game engines such as PICO-8, LÖVE2D, Godot and many more! Some of the game engines that come pre-installed with the GameShell have games pre-loaded on to them, so make sure to explore each one!
The full list of compatible game engines are:
Emulators
The GameShell OS comes pre-installed with lots of open source emulators. You can think of emulators as apps that can virtually run a retro console inside your GameShell. Unfortunately the GameShell doesn’t come with retro games for its retro console emulators; so we’ll have to do a bit more work to get things going. You’ll need to:
- Find the specific retro game ROMs (i.e. game images or game backups)
- Upload the ROMs onto to the GameShell
- Get playing!
Most of the emulators that you’ll be using are installed under the Retro Games folder in the home screen. You can check out the full list of supported emulators here.